Learning To Create a WCF Web Service using PowerBuilder 12.5 .NET
UPDATED 10-15-2012
- Visual Studio 2010 to Visual Studio 2012
- Added Multi-Row Results from Web Service
- Added Update via Web Service
- Added Insert via Web Service
- Added Delete via Web Service
- Updated from MVC3 to MVC4
- Added Downloadable Source Code (see final page of this article)
This is a completion of a prior article where I talked about my first experience using PB12.NET to create a WCF Web Service. The WCF Service accesses a Microsoft SQL Server 2008 database and is used to provide data to a web application written in ASP.NET MVC4. If you want to get a background on my process and take a look at the web service in action then go back to my Creating a WCF Service using PowerBuilder 12.5 first.
Goals for the Sample ASP.NET MVC4 Application utilizing PowerBuilder 12.5.NET WCF Service
- Learn how to create a WCF Service in PB 12.5
- Connect to and provide data from a SQL Server 2008 database.
- Use the Web Service in a simple ASP.NET MVC4 Web Application
- Utilize Authentication in Web Application
- Use single row result from Web Service
- Use multiple row result from Web Service
- Add rows via Web Service
- Delete rows via Web Service
- Update rows via Web Service
All data access will be handled through the PowerBuilder WCF Web Services going against Microsoft SQL Server 2008.
All front-end display and editing will be handled using ASP.NET MVC4.
Motivation for the project is primarily learning, however I would like to continue the application to replace a link directory website that is written in PHP and mySQL.
To my surprise, creating the Web Service was very easy. The code inside my non-visual user object was simple as I have been working with datastore’s for years and using them comes second nature to me. The only real difference between creating a basic non-visual in a PB application, or using one for a Web Service, are that you have to make a lot of settings on the project object that you were not used to seeing and you need to know the basics about WCF Services. You need to think about which functions you want to be “exposed” inside the .NET application. Then you need to understand which data types you can use without problem and how the various data types map between PB and .NET.
Step by Step Creation of the PowerBuilder WCF Service
I promised a step-by-step and was reluctant to post so many screen prints, but my goal was a “complete” reference for how to create a working Web Service. With that said we’ll start by opening PowerBuilder 12.5 .NET
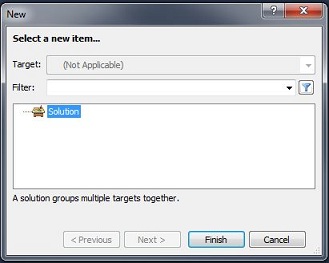
Start by File–> New and choose Solution and click Finish. You will have a chance to name your Solution in the next step.
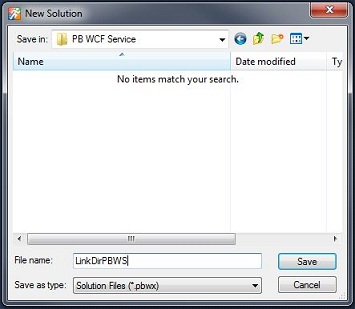
The second step is naming your PowerBuilder Solution.
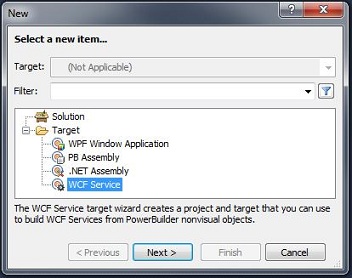
After clicking save, click on Start –> New again. Choose WCF Service from the Target tree view item.
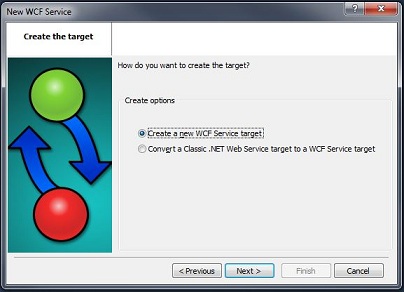
Next you choose whether you want to create a new WCF Service target or create one from an existing Classic .NET Web Service Target. I chose to create a brand new WCF Service. Then choose next…
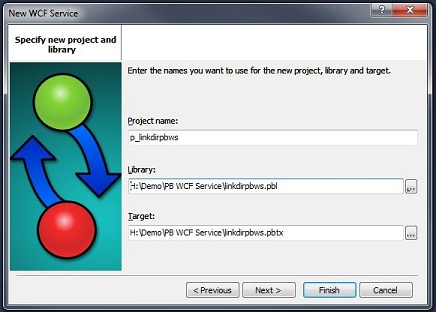
There are a lot of dialog windows in the process of creating a new WCF Service, this one is where you name the project and the PBL’s associated with it. You also name the target file itself, I left the defaults which were populated using my Project Name selections.
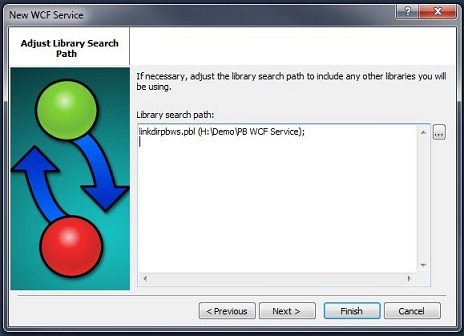
Choosing the Library search path was another “default”. Since I was creating a new WCF Service and didn’t have any existing PBL’s to utilize in the process I left the default which was the PBL name of my project. Again I clicked Next…
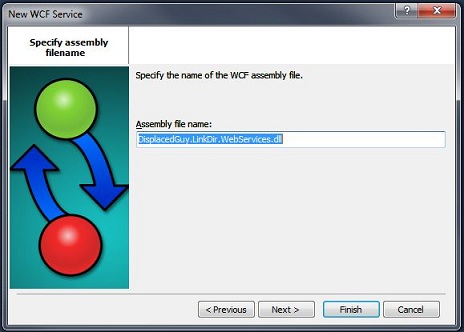
There are a lot of questions along the way where you could just take the default. Here is where you choose what name you want to use for the actual assembly file name. If you wanted to consume it in a .NET application you’d go and find this assembly and add it as a reference to your .NET project. I chose a cool name here and ended up changing it later, choose anything you like here. As much as I wanted to hit Finish by now I clicked Next again…
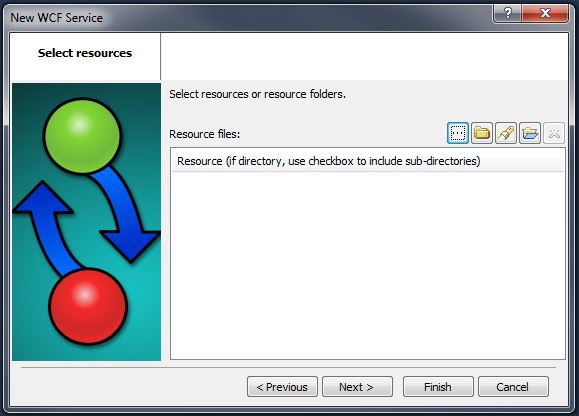
MISSING SCREEN PRINT
When prompted for “object to be initially created with the target“, choose NONE
We will create n_datafactory a non-visual user object later that contains the logic for WCF Data Service
Next I took the defaults on several dialog windows of the wizard for creating WCF Service in PowerBuilder.
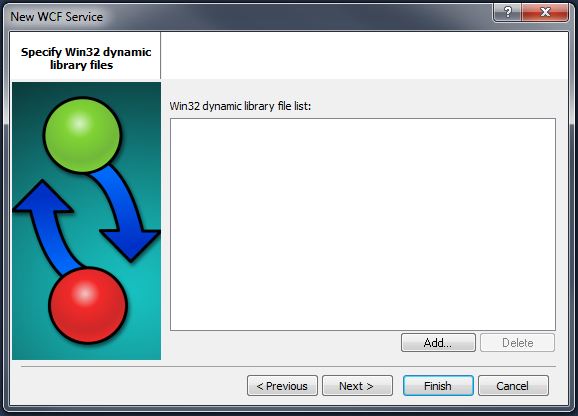
I didn’t add any Win32 dynamic library files…
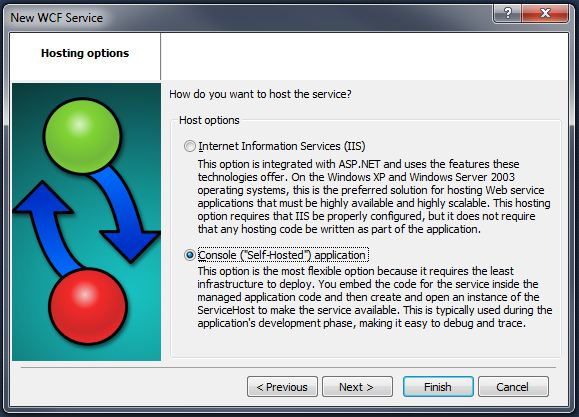
This option I chose to create a console (Self Hosted) application rather than an IIS Service. I based this decision on reading the dialog and believing that setting up the IIS hosted service would be more difficult. The goal of this excise was to get one working with retrieve, insert, update, delete. The next update will use IIS hosting.
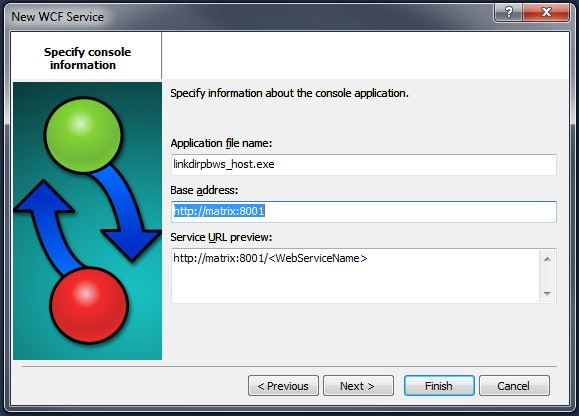
Here I set the base address to my machine name and left the port to 8001, the port that PB had chosen for me. You can use localhost instead of your machine name if you’d like.
Please continue with the Step by Step creation of a PowerBuilder WCF Service Page 2
p.s. Before you go… would you do me a favor?
Please click the Google +1 icon at the top of the page if you like the article? It is an important measurement tool that Google uses to determine what is real content and what is spam. This article took a lot of time to create and the plus one makes it worthwhile. 🙂
9 Responses
[…] For more details continue on to the Step by Step process of creating the Web Service in PowerBuilder 12.5 .NET […]
[…] Back to Page 1 of the article […]
[…] Creating & Using a PowerBuilder 12.5 .NET WCF Service. – This step-by-step article contains over three dozen print screens and is a very detailed step by step process that I used when creating my first WCF Service. This is intended for PB developers who have not yet created a WCF Service. […]
This has been quite helpful. One quick nitpick – you want to click File->New, rather than Start->New. 🙂
Fixed! Thanks for the feedback Trevor. 🙂
[…] PowerBuilder WCF Web Service consumed by ASP.NET MVC web site. This is a full blown example from start to finish using a simpler self-hosted web service rather than an IIS hosted web service. This three page article covers all steps in creating a WCF Web Service, consuming the web service via ASP.NET MVC, and includes source files for download. […]
I’ve been enjoying reading through your posts. I’m working on a slightly different problem, though, that I’d like to run past you for any suggestions, pointers, etc.
I have a number of PB Classic (12.5) apps that are currently connecting to hosted webservices by using Powerbuilder proxy clients (also built in PB Classic 12.5). The downside to this is that the proxy libraries have to be included in the legacy apps for everything to compile properly.
Ideally, I’d like to leverage PB.Net 12.5 to create a DLL that contains the controlling nvo and methods specifying dynamic database connections, initialization parms, etc. This way I can avoid the need to include the additional libraries and just make external function calls from the classic clients. Do you know if there is a straightforward way to do this?
Yes, there is a way to do what you describe and I don’t have the syntax with me right now but it is basically a precompiler block that tells the compiler if this is PBClassic then run this code otherwise run the .NET code.
It looks something like this (but I forget the actual tag names) you should be able to find it in the PB Classic help file. 🙂
Maybe this is worth doing an article about…
#pbclassic
int li_x
messagebox(‘hi’,li_x)
#else
int li_y
messagebox(‘ho’,li_y)
#end
Thank you for your comment.
Rich
I don’t know of a specific way to do what you describe using PB.Net 12.5. The general principle is to create your PowerBuilder NVO, and in your project object make all the methods, properties you need access to public. You can also used shared connections by passing connections to the nvo. I haven’t used the shared connections in PowerBuilder, might write an article on that as it is interesting subject. Thanks for the comment.